Saturday, October 30, 2010

Pre November Small Update

Doesn't this look familiar? Our drawings got displayed again!!

Another Master Copy that we did during class assignment. This time round we have to work on line quality and using hatching to achieve light and dark. This study is done on Michaelangelo's work where the process of drawing a human figure is created through sculpting the proportions rather than developing the lines from basic.


Our Hobbies and how we learn: Here's a couple of stuff that we ordered recently. All of them are excellent works by very good artists. Highly recommend these 5 books!! We normally read a range of books from indie works to pop stuff. Amulet as seen in the middle is currently in its 3rd volume. We've been chasing Kazu Kibushi for 8 years now. During his first year where he was doing web comic on his website BOLTCITY in flash instead of html, we started joining comic competitions. We've traded emails during those first 2 years but we changed our email accounts and went into army. Since then, we've been watching from afar and his now really way ahead in terms of skills, story telling, awards, professionalism than we are. It alway gives us mix feelings as we started on the same page as him but years later, we're so far behind. There's a whole list of rant we can go on regarding this and also the books that we're reading in terms of art styles, story narration, timing and pacing but we'll really like to leave that to your exploration while we go work on our skills. Till the next time, we wish everyone a Happy Halloween.

Wednesday, October 27, 2010

Sculpture Assignment

Warning!! Long Post Ahead: Today marks the end of our third assignment in 3D Design. Finally managed to finish this epic Old Man Super Hero Wannabe sculpture. Attached is a documentary of the process.

This is the first process of Sculpture modeling for Sculpey. The armature is made up of 1/8 inch wire which makes a pretty strong foundation for Sculpey. Building of the armature is done with one single 1/8 inch armature wire.

More delicate features like fingers are normally made with the smaller 1/16 inch armature wire. An important thing to take note is that the wires need to be coiled tightly to prevent the sculpey from breaking up when it is bake at a later time.

Notice how the fingers get twine around the bigger amarture.

Front View of the basic armature made. The cape at the back is made out of mesh wire.

Side View.

Back View.

Because of the fact that the armature will eventually be mount onto a board, (This is because the model is in a dynamic running position is whole body suspended in mid-air less one leg and cane) it is always wise to leave enough armature wire for attachment rather than trying to epoxy when its done in this case.

A surgery is done at this point of time because without a skeleton for the foot, the sculpey might fall apart during baking or when the model is transported.

Close up of foot.

In order to make the movement more dynamic, the cape is enhanced with 1/8 inch armature wire to give strength and structural integrity.

Back View of the final armature. Aluminium foil is used to cover up any gaps that might have existed in the armature. It also helps to heat up the sculpey from within when it is bake in the oven.

The next step: Adding Sculpey.

Top view of the finish Sculpey foundation.

Texture is added to enhance the aesthetic look and design of the model.

The facial feature is created by adding layers of Sculpey onto it. It gives us more control over the model.

Moving on to the body.

Close up of face feature.

Because the model is eventually going to be an old man, it is important to research the body build and reference of the actual figure to create that believability of the model.

Front Shot.

Texturing of Cape.

Close up of boots texture.

Side View of Boots.

Once the textured is sculpt into the sculpey, the model is ready to bake. For Super Sculpey, the baking time is 15 mins under 275 degree.

Front view of the bake Sculpey.

When the Sculpey turns brown, it is probably baked and ready. Notice the top part of the model is burnt and the foot still looks like its not done. Don't worry about the uneven in baking, because as mentioned earlier, the aluminium foil in the armature will continue to retain the heat and bake the Sculpey from within. Be sure to set the model aside for 15 mins to cool off.

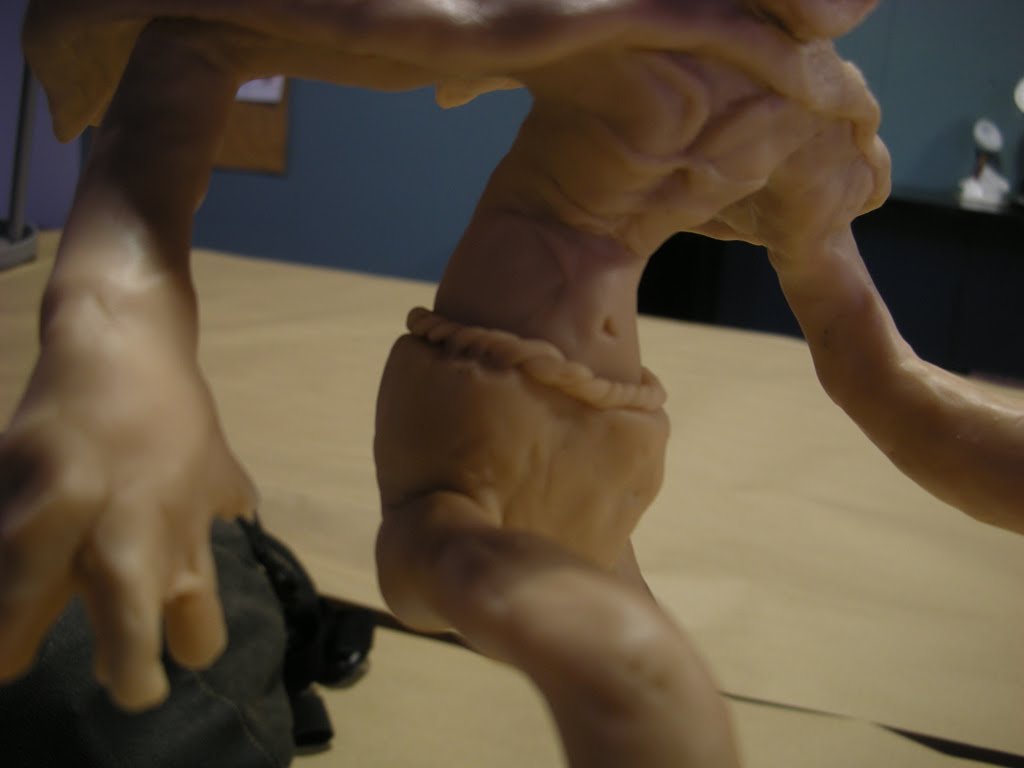
In this project, Acrylic is used to paint over the Sculpey. The good thing about using Acrylic is the fact that when it is dried up, it holds on very well to the model.

Side view of foundation color.

The wooden cane is colored multiple times with different shades of brown to give the illusion of depth to the model.

Final Finished Model!!

Side View.

Friday, October 22, 2010

Personal Value Study


Open Model Drawing Session: During Fridays and Saturdays, our school provides free nude models for drawing sessions and we've been trying to make time for these practices to improve. However, we always miss the long drawing sessions and end up doing 15 minute poses. The above value study is one such example we did today. We also took time to do some skull study today. (Second value drawing) We've attach our skull drawing (Third drawing) that we did during our polytechnic days and wow.... its really crappy and we're just amazed how much we've learnt.

Drawing Form with Chiaroscuro


Walls of Wallin Hall: This was our first assignment studying form with Chiaroscuro. We had a series of animal bones hanging on the studio wall and using techniques like Triangulation, Non-Parallelism, Site measuring and the six zone system of Chiaroscuro, we had to create form using charcoal. The drawing is about 18X24 and a lot of the studying has to do with balancing negative and positive space while maintaining an interesting composition.

An interesting discussion: We are extremely proud of this particular piece of work because during class critique, there were a fair share of students who thought that the composition was off balance; their reasoning is that the dark values on the right side of our drawing is too overwhelming compare to the emptiness on the left. That argument left us giggling in class because, isn't white space a form of color and balance to that extreme dark on the right? And we did left pockets of emptiness at strategic areas to balance out that extreme didn't we? Well fortunate for us, there were students who thought our work was perfectly balance without our explaination, and so did the professor for our class. The only issue now is, the drawings is being displayed on our foundation drawing hall and it was badly managed. ( you can see a faint cross line between the drawing and dirt and hand prints over the piece despite us having a piece of transparent paper attached as cover) Anyway, we're pretty lucky and happy that we got to exhibit this among other talents on the walls of Wallin Hall. In case you're wondering, its a rib-cage that we're drawing.

Tuesday, October 19, 2010

Drawing Light and Space


This is the continuation to the previous value study. However, the drawing is done over a period of 1 week in the hours between 11am-1pm. This still life observation of landscape drawing force us to work our drawing into an "ideal" possible scenario. Due to the fact that its impossible to sit at the exact horizon line drawing the subject in between days, we had to get the basic shapes and values out during our first draft. Although the lighting might differ during the days, our general observation shows that the values of the subject will have an overall similar balance to it. The hardest part is getting the lightest shade of grey onto the piece of BFK paper. We managed to get a darker value of black in this drawing by using Rembrandt's soft pastel. Once drawn, the pastel sticks very well on the paper. This is our last exercise for charcoal and we'll be moving on to graphites and watercolor pencils.

*Update: We decided to post a second drawing of the same place that we drew.

Saturday, October 16, 2010

Asia Comic Studio Contest


This comic was created during June 2010 for Asian's Comic Studio Competition. We submitted this in the "Future Short" Category. The theme was "Adventure" and thus we selected a short adventure base on the trial software "Comic Studio 4.0 EX" which we use to create our work. (Using the software was a requirement) We were lucky enough to win the 3rd prize of this contest competing against regional artists from Malaysia, Thailand, Philippine, Indonesia and of course Singapore. We happen to chance and read it again after organizing our portfolio as school's mid-term came to an end. It reminded us how badly we wanted to do story creation and all the things we went through to get ourselves here in Savannah.

Planning ahead: We're currently planning two short comics to be completed for competition and portfolio sake. There's also a picture book that we've started painting. Though our schedules are packed with homework due back to back, we're still avidly drawing comics. We have also been selected to showcase our illustrations in two separate exhibitions at the end of the year and we're planning for a few series of illustrations hoping for more gallery shows ahead. Do drop us a note if you know of any call for entries. (^__^)

Wednesday, October 13, 2010

3D Study: Lines, Planes, Mass & Volume


Studying of Lines, Planes, Mass & Volume in 3D Design: Our latest journey in the study of 3D Design got some good grades and result that we're pretty satisfied with. (19.5 out of 20) For this project, the requirement is to create a piece of work that includes the four mentioned properties. Of course to meet the basic requirements, we just need to put together a long strain of wire, a hollow cylinder and a square block and the 3 items would contain those four elements. That would just give us a barely D grade. This project is to test a student's understanding and ability to create a unified work that contains all these elements while making it exciting.

Our Thought Process and Approach: During the research phase of our work, we were both inspired by traditional Japanese Paper Lanterns. Through developing the design, we wanted to take some of the elements beyond conventional interpretation; such as that of volume seen in our final product which is actually created in the negative space contained by triangular wooden blocks. We use long wooden blocks to create the exterior structure which incorporated line as a design element. The contained space as mentioned previously creates an imaginary volume. Mass is identified by the multiple wooden square blocks floating within and of course with mass, planes would be present. The fishing wires that are holding these wooden blocks ain't that visible in reality and the illusion is created by having the transparent wires running through the square blocks. (If you look closely, you'll be able to see the marks cut off from the wooden blocks) It took a lot of time to cut out and stick the pieces together from the wires to the wooden base holding the triangular "frame".